
Building SO Much More Than a 3D Community: Take 3
This is now the third year that I tackle this project with my students, and every year, it grows into something even better than the year prior… Bigger final product, a wider audience, and deeper learning! I blogged about last year’s experience, but lost some of the pictures and videos when I revamped my blog last summer. Here is a post for this year’s process and all of the behind the scenes that led us to our incredible and massive 3D community! Hope you enjoy it!
A brand new school, eager teachers and students… it was time to end the school year with a BANG! My 1st grade colleagues, Nadine Klowak and Caelin Philippot and I started planning our collaborative community project and we knew that it was going to be an incredible learning experience that our students wouldn’t soon forget. It all started with our essential question:
“Qu’est-ce qu’une bonne communauté?” (or “What makes a good community?”).
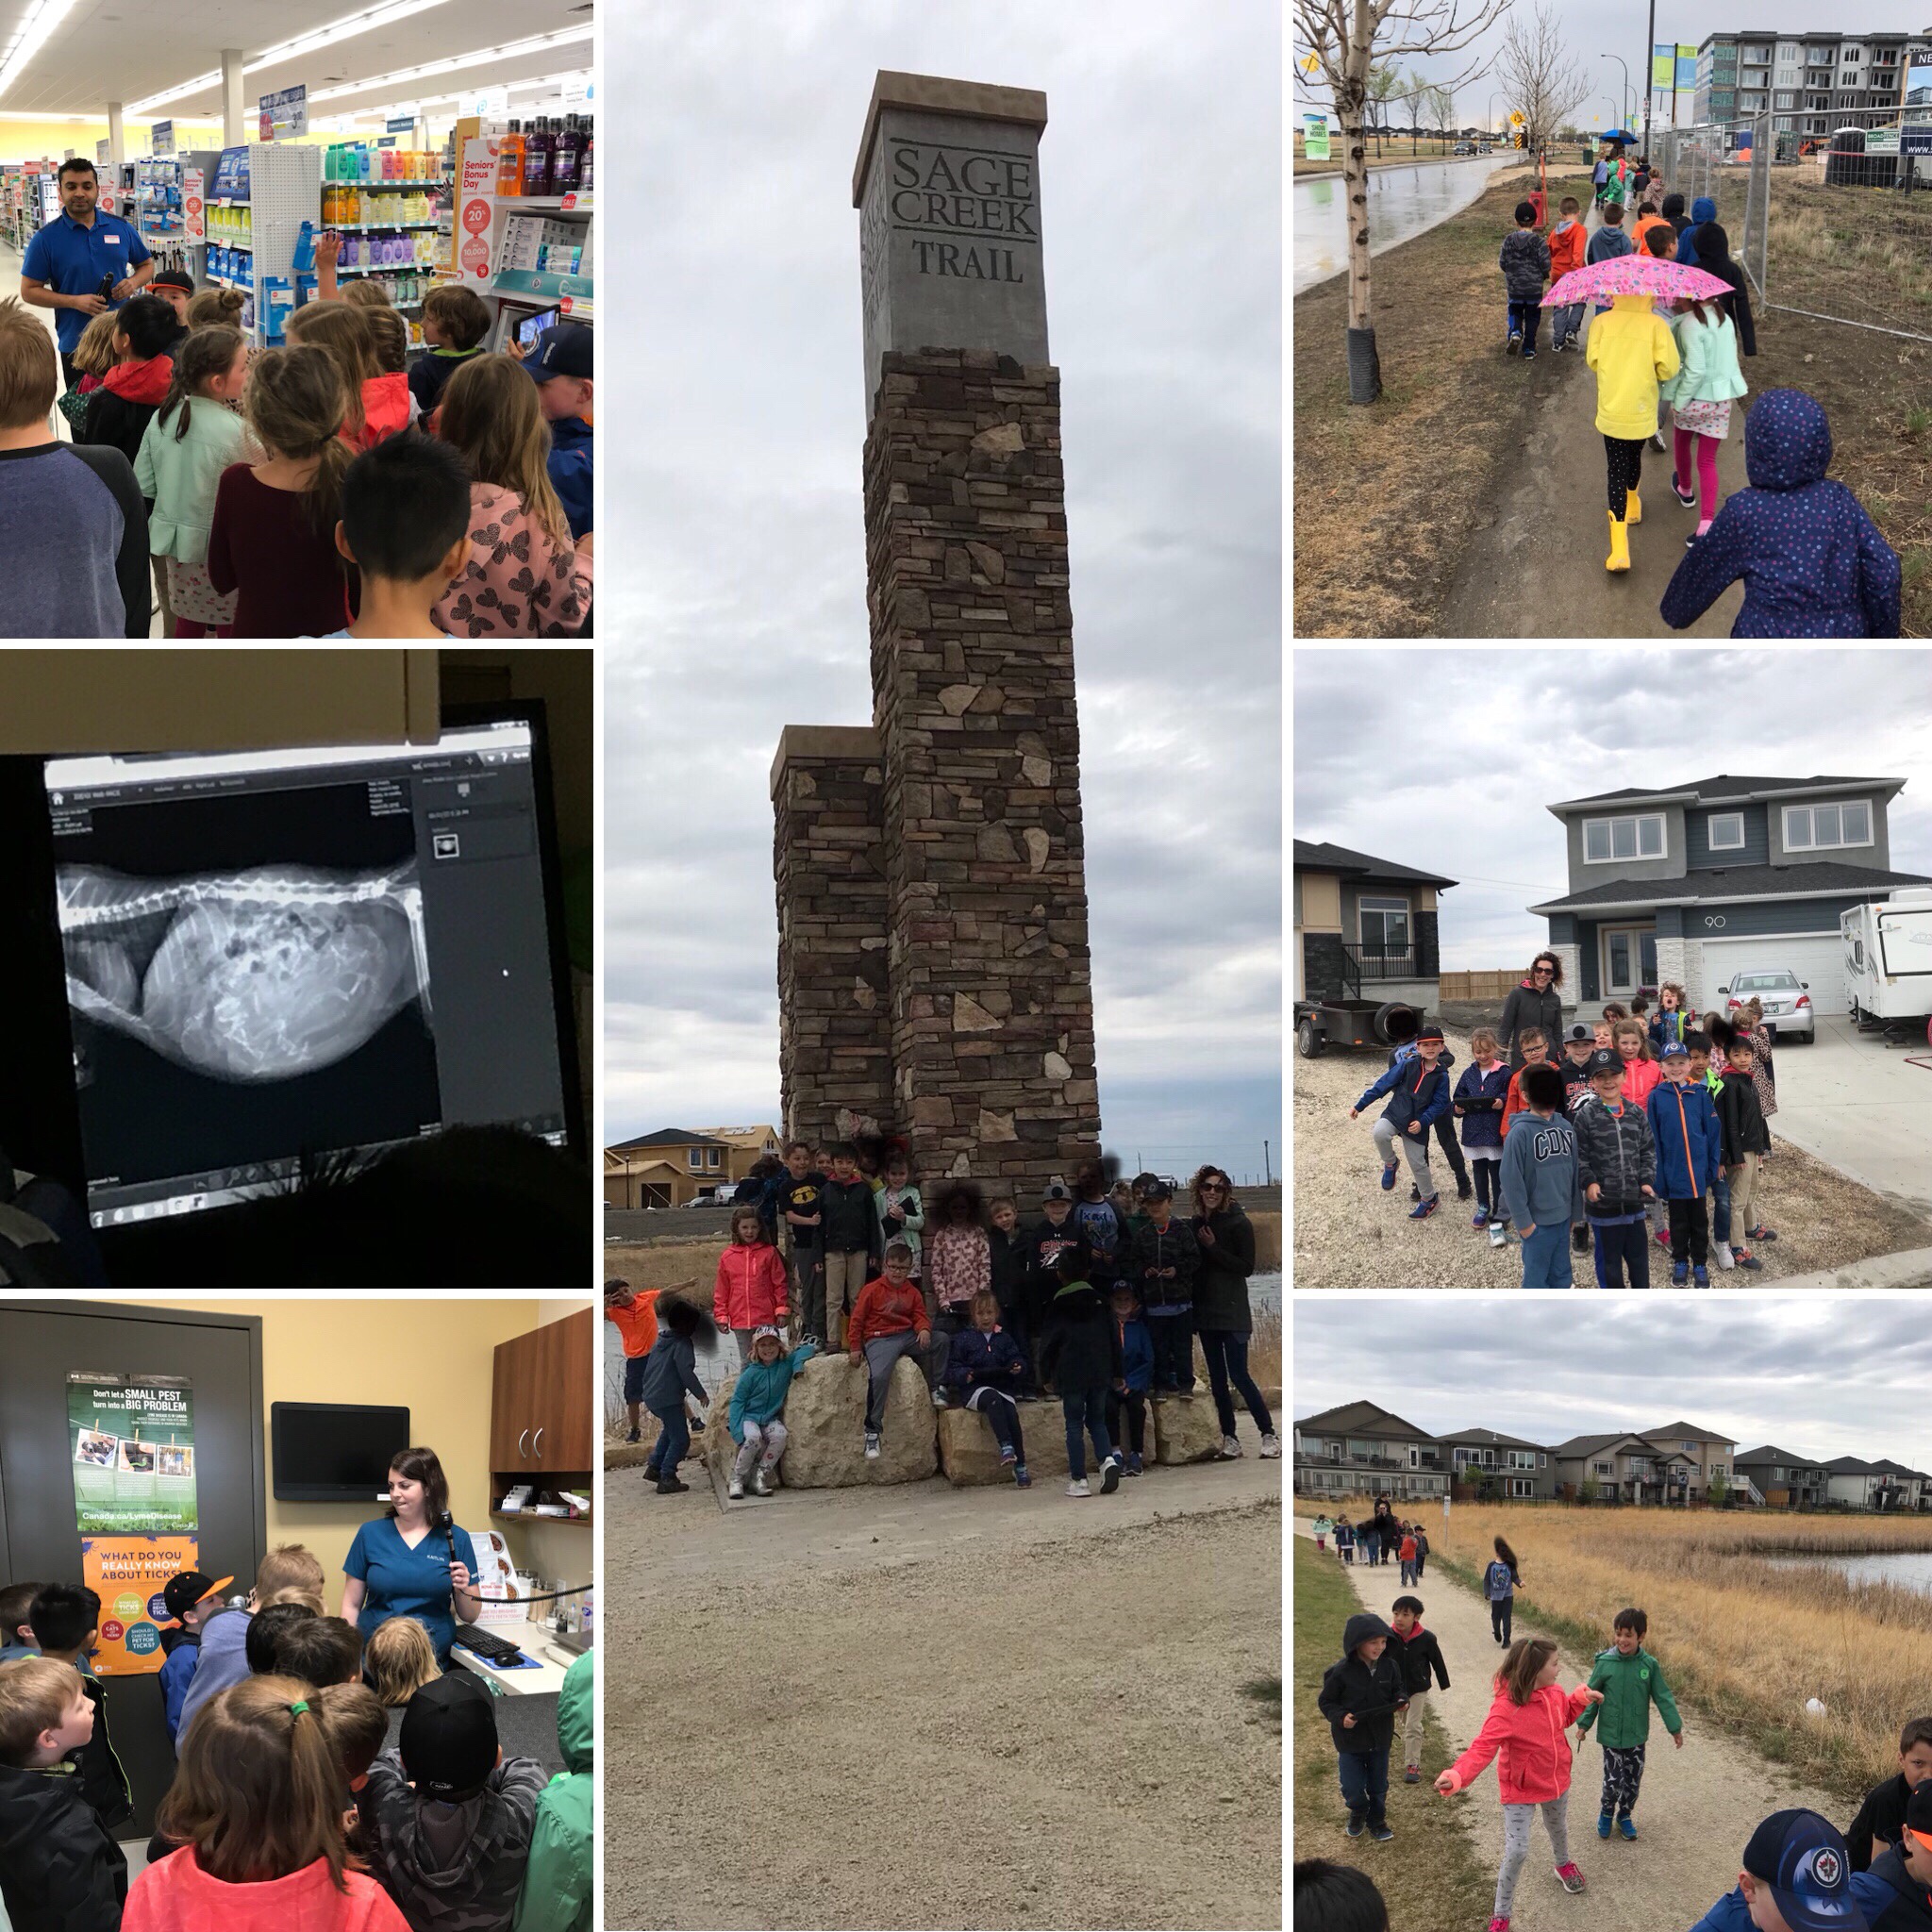
Discussions and research in the form of reading books followed to determine what in fact was a community. We then took several walks, taking pictures of our surroundings while noticing what details were included in our community, and we had a lot of fun finding students’ (and Mme Annick’s) houses. During our walks, we also visited local businesses to learn a bit more about what types of services they provide to our community. My class visited Shoppers Drug Mart and Sage Creek Animal Hospital, while Nadine’s class checked out Sobey’s, Pet Valu, and Sage Creek Physiotherapy, and Caelin’s class went to McDonald’s and RBC bank. We gathered all of our research and then we created a web of ideas in order to try and answer our initial question. Furthermore, we complied the pictures that we took during our walks and business visits in order to make short videos that our classes shared with one another. Finally, we used Google Earth in order to look at all of the students’ houses and apartments and also to examined what was close to their homes. It was pretty cool doing this project in a brand new area; some houses were fully finished, while some houses (like mine) were still just a pile of dirt. After learning from our friends and checking out Google Earth, we added to our brainstorm web. Next, we started planning!
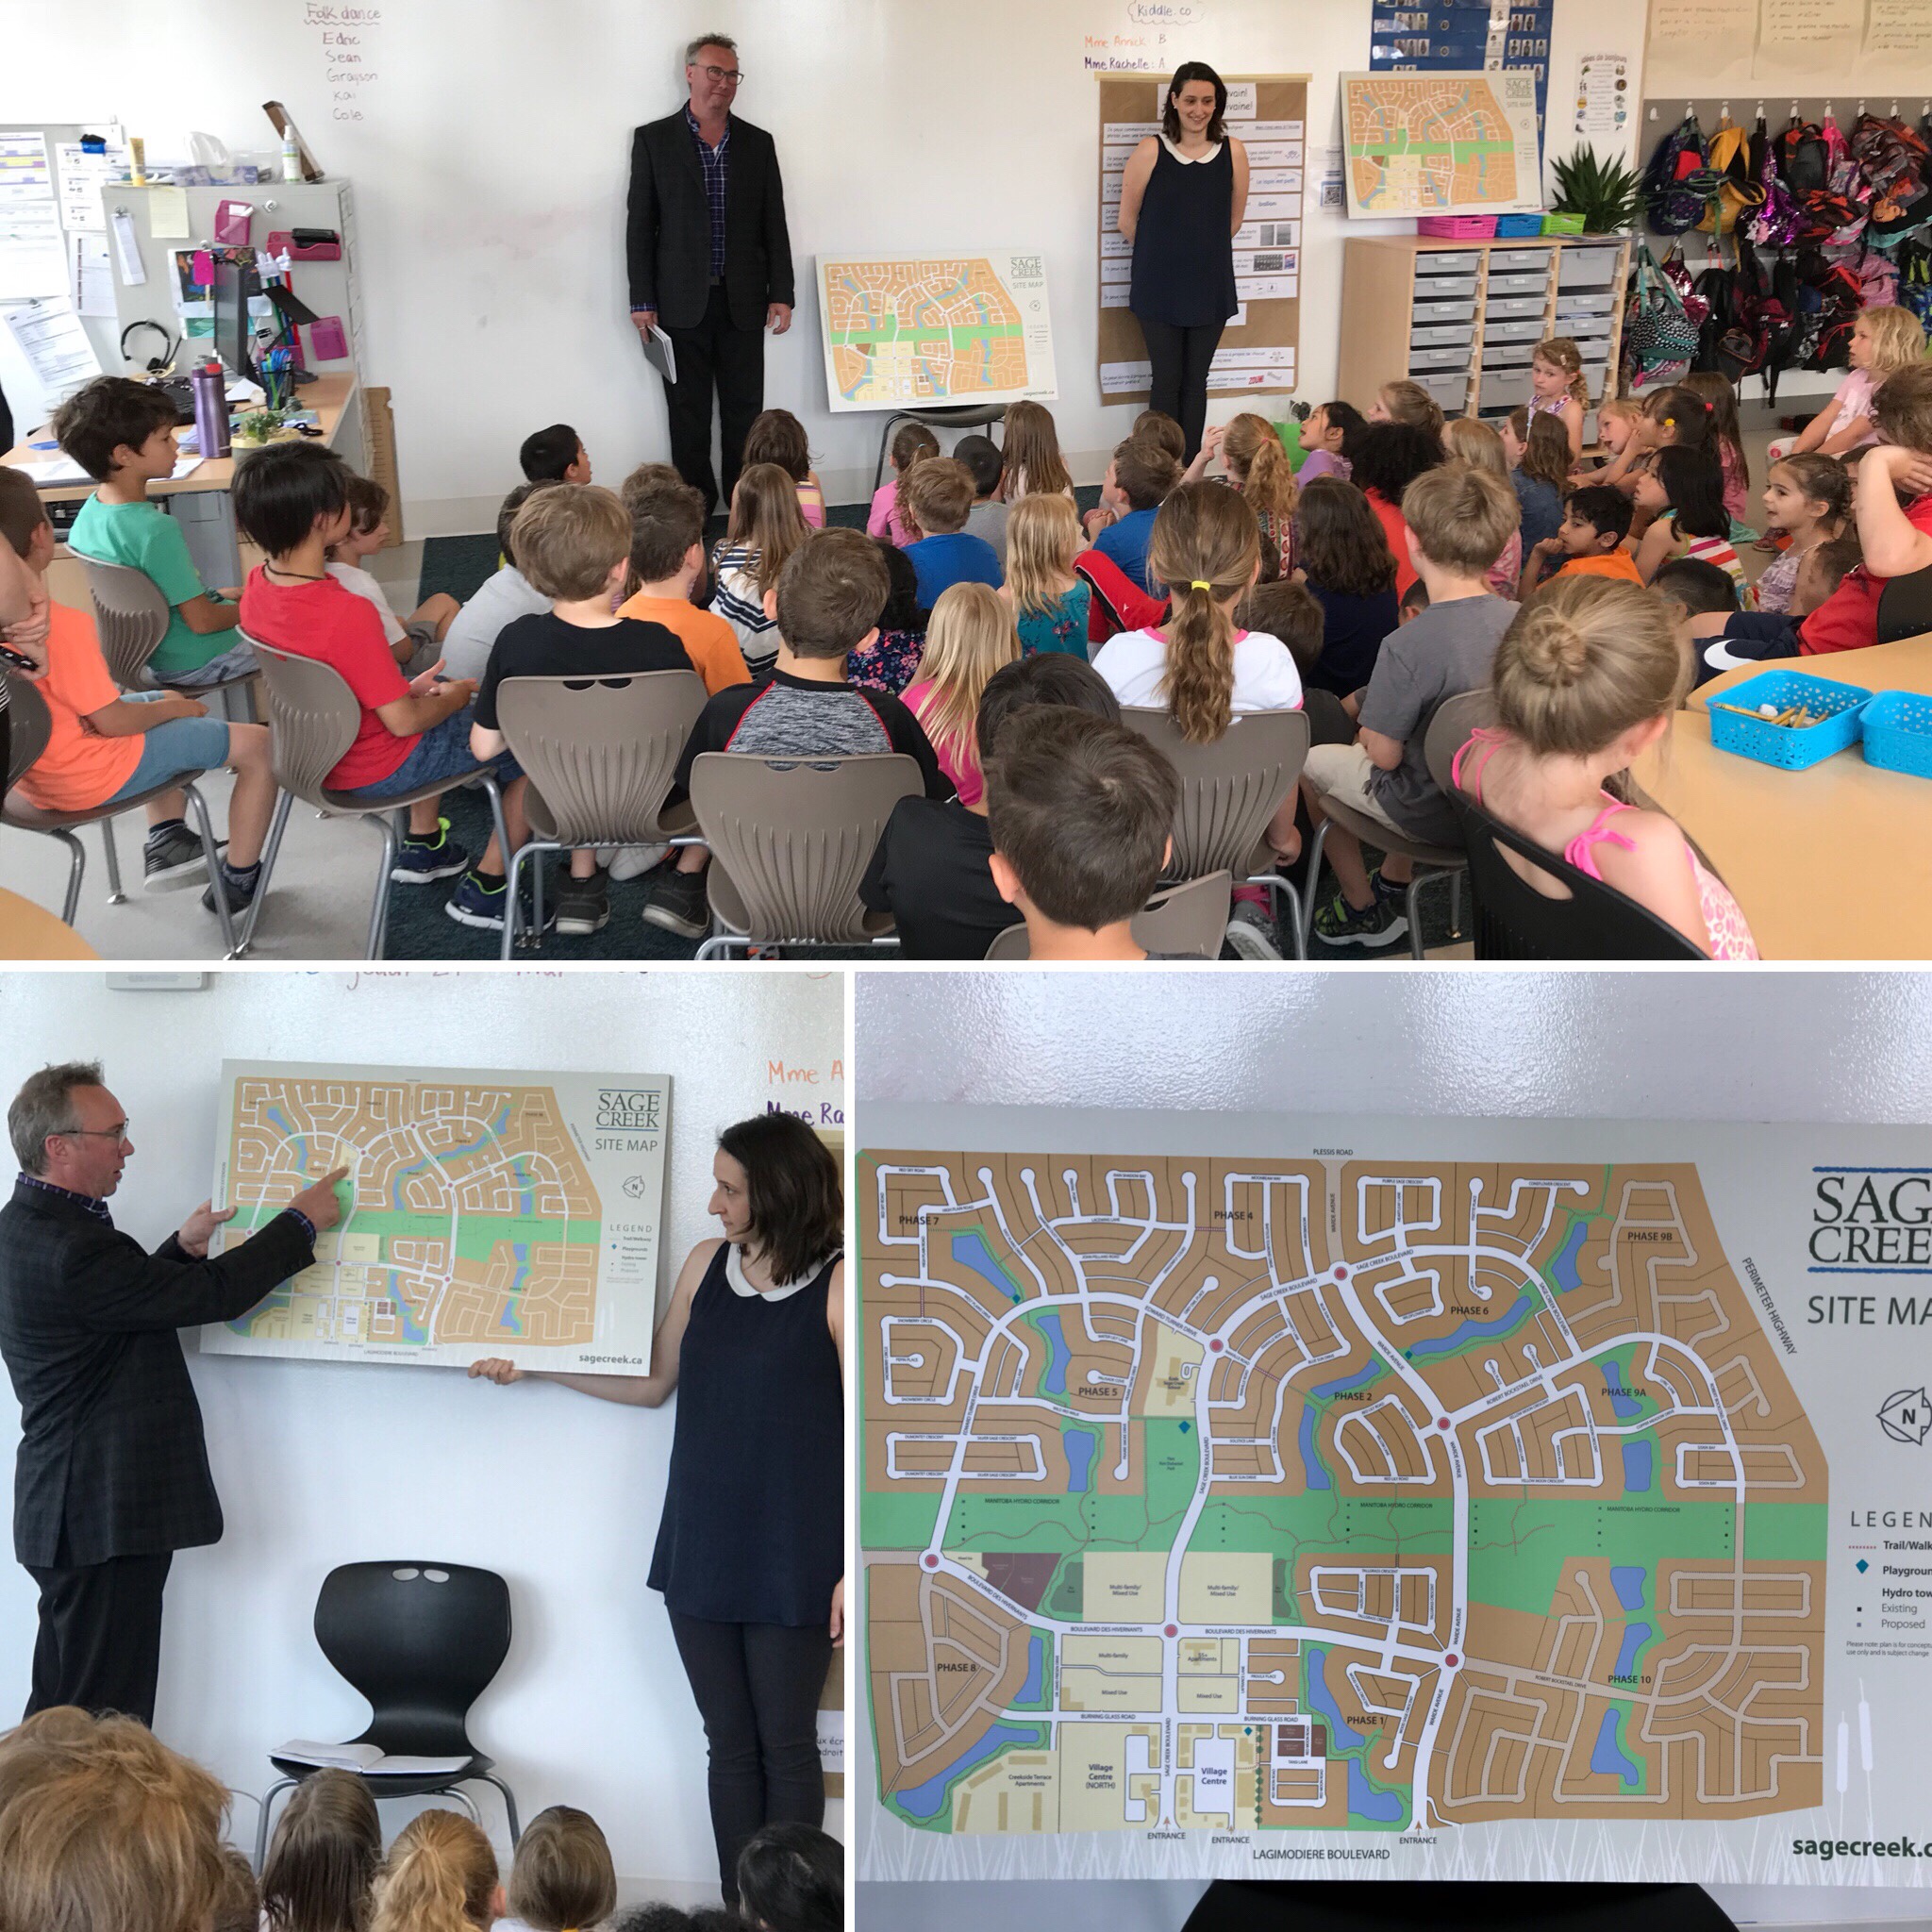
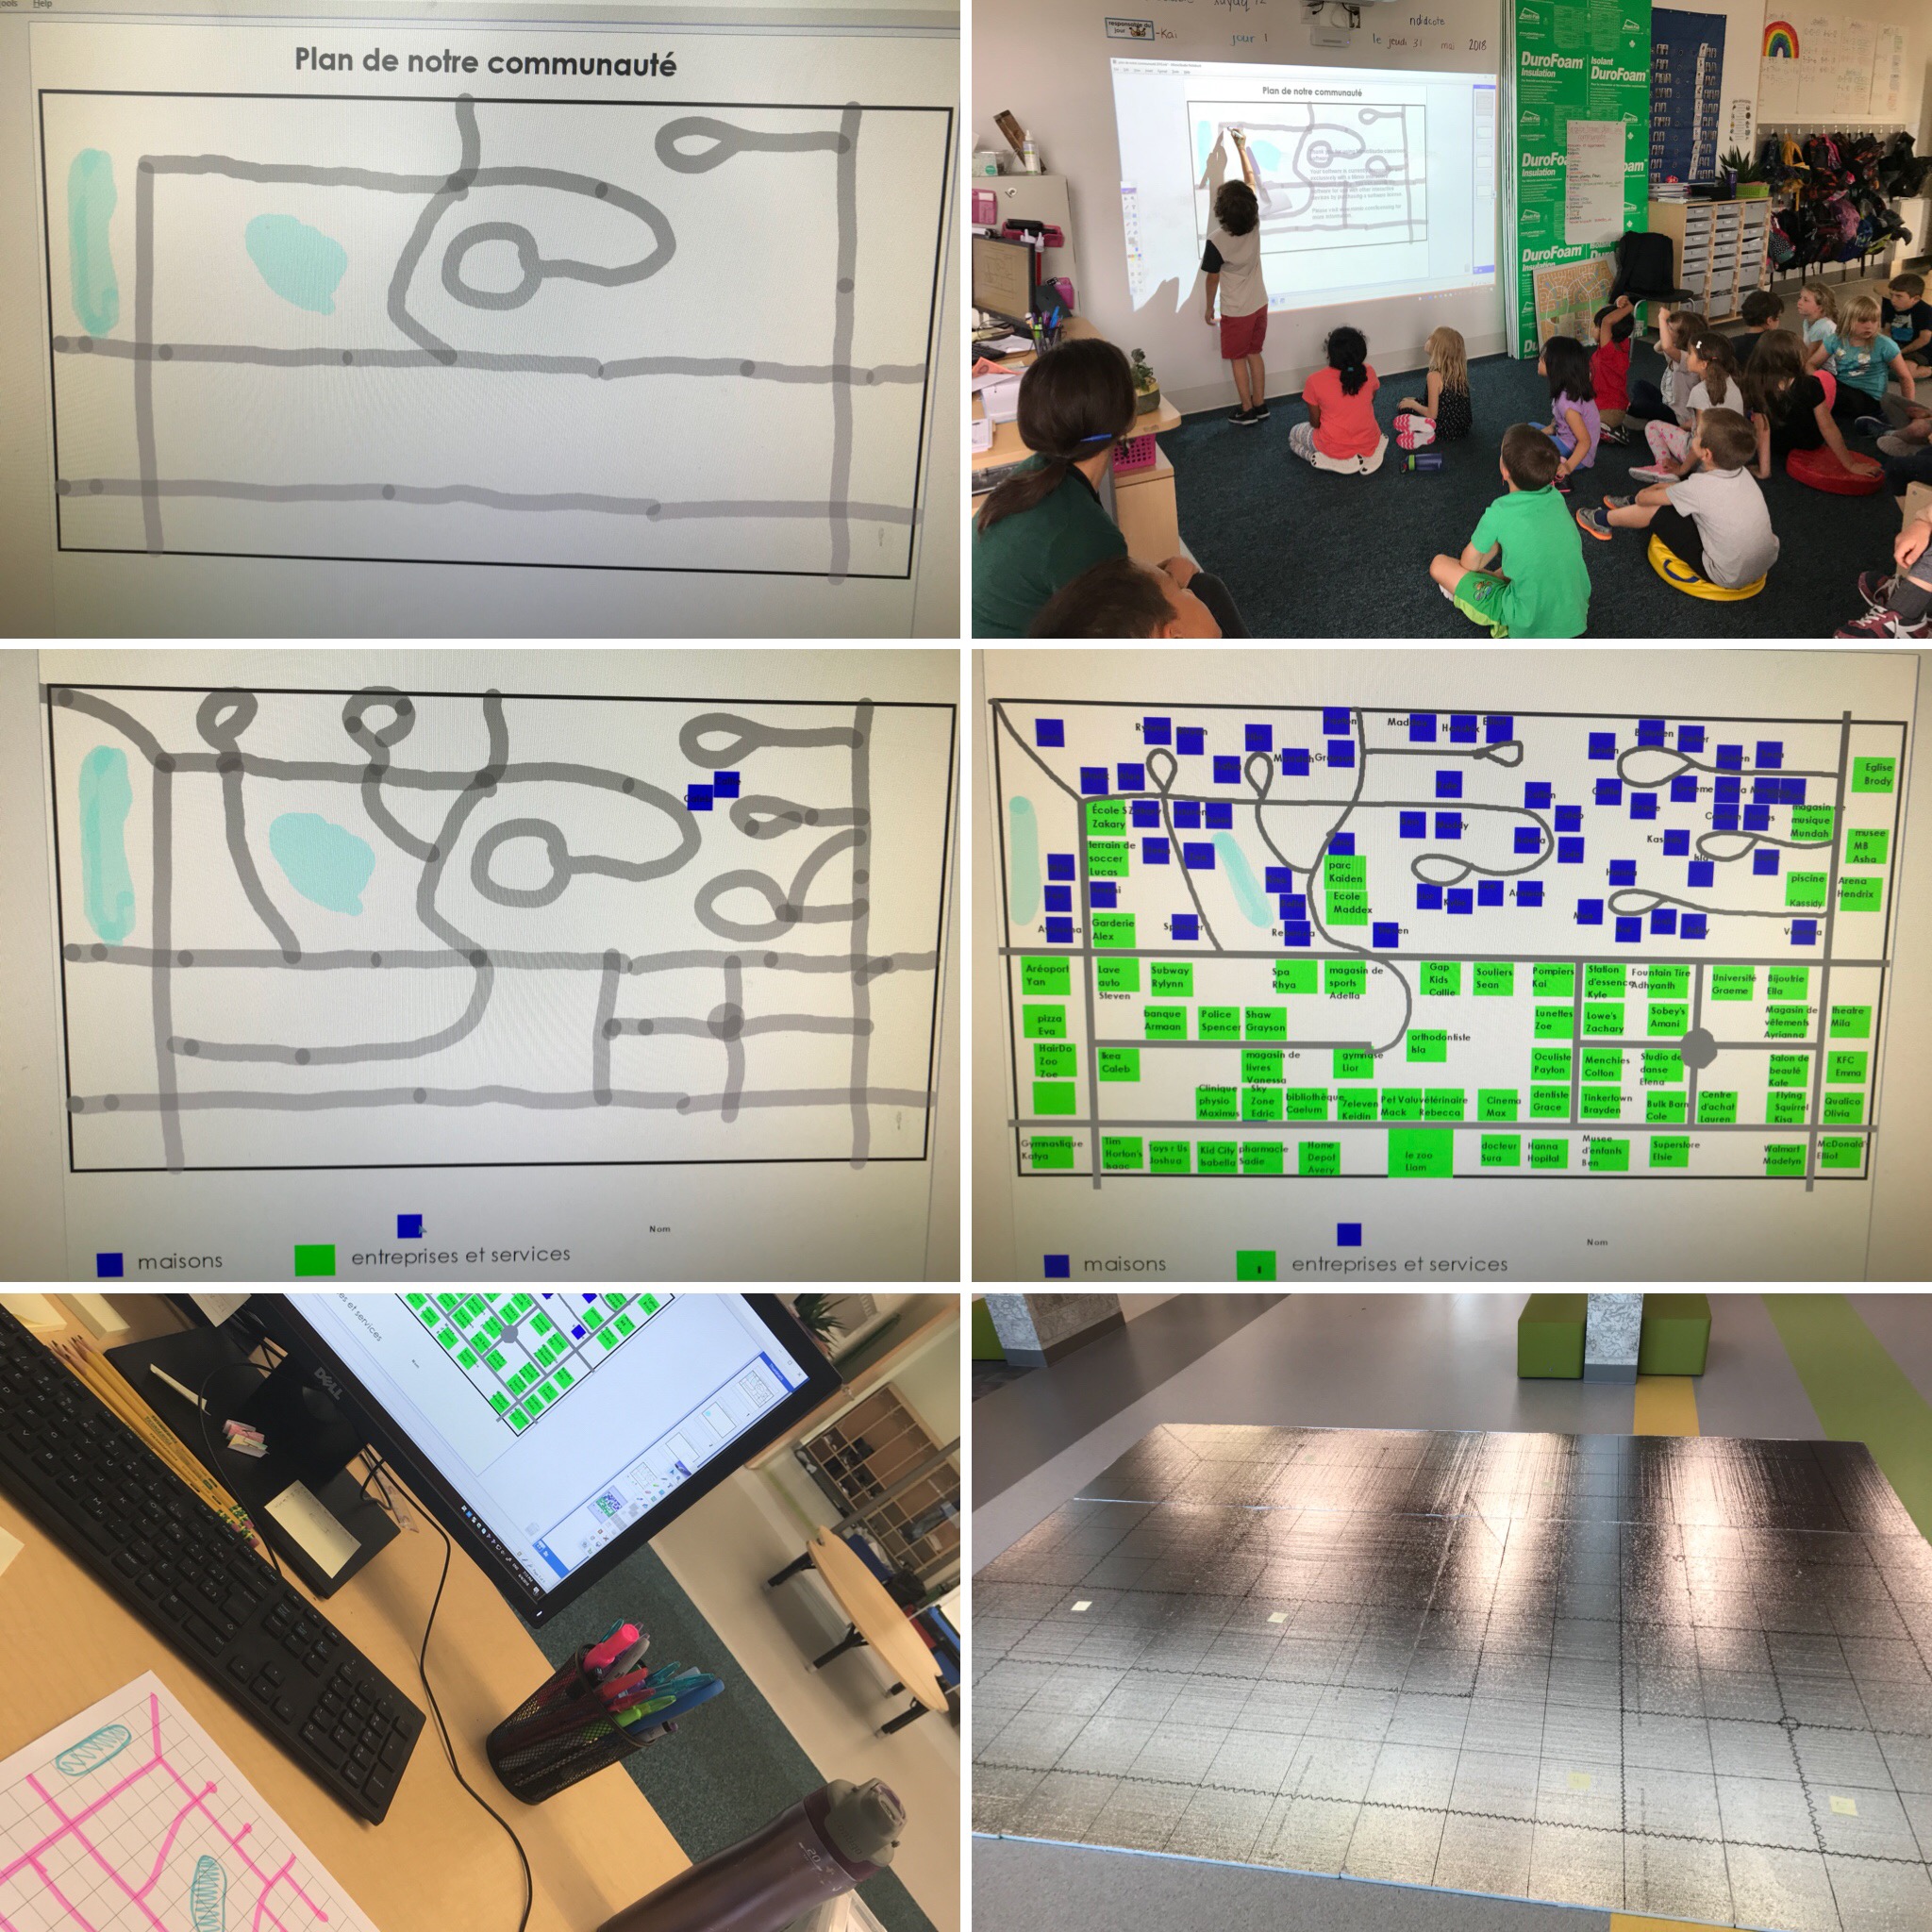
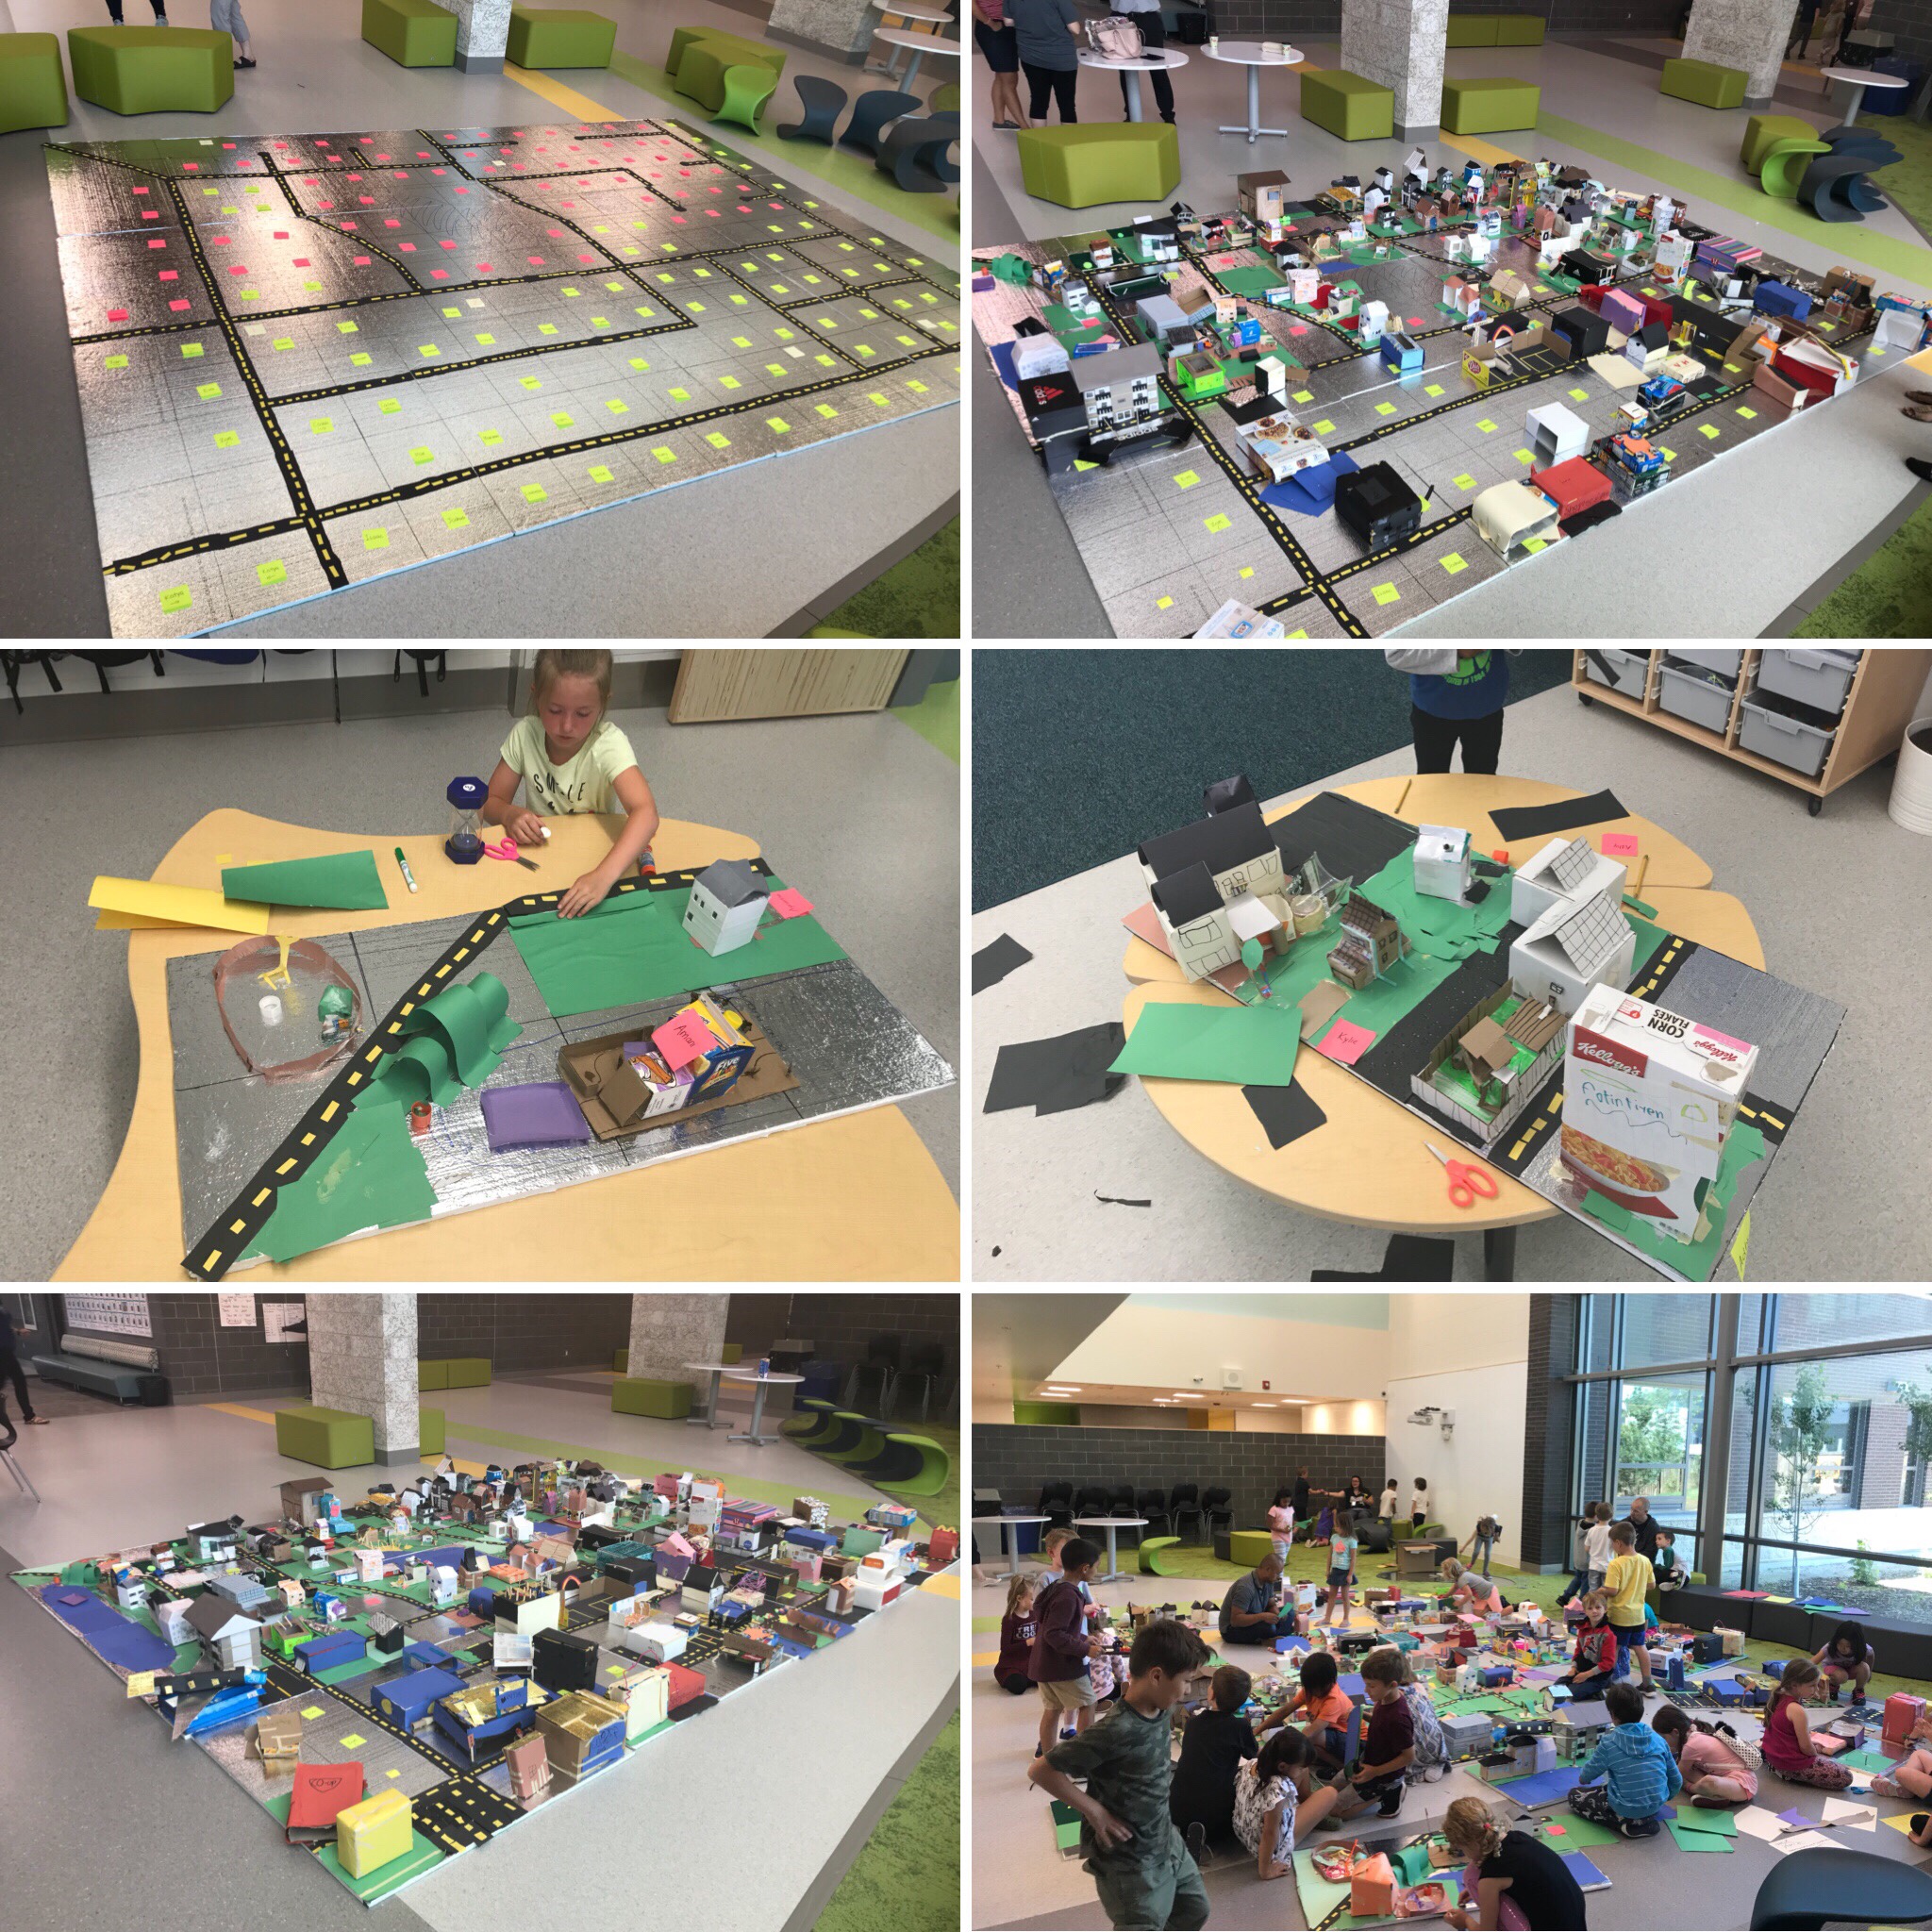
First, we had to determine what businesses and services we thought would be important to include in our community, and which ones would be extras (and although not necessary, fun to have). We wanted each student to build a business or service as well as their home, so we had to have a whopping 68 different businesses or services ideas. Once that was done, the students decided which business they were going to be in charge of creating. It was also decided that the students would build a mini replica of their house/apartment block at home with the help of their families. Once those decisions were made, we started drawing out the streets, but even this took several tries as windy roads weren’t efficient. We were so lucky to have had Qualico (the land developers that actually planned and developed the community we live in: Sage Creek) come and speak to our classes. They explained so much of what goes on when planning a community and gave us so much food for thought that we were then able to take into consideration when planning our own invented community, inspired by Sage Creek. We also used the blown up map of our community that Qualico gave us and pulled up Google Maps to see what roads typically look like from a bird’s eye view. We used all of this information to guide our next attempts at drawing out the roads. Then, with the roads and ponds planned out, it was time to place our houses/apartment blocks and our businesses on our plan. This was the stage where critical thinking and good communication really came into play. The students had to decide among themselves where everything was going to go. Comments such as “houses are usually in the same area” and “apartment blocks are usually closer to the businesses because more people live there” and “I think the gas station should go here because it’s on a main road near the exit of our community” were made. Great discussions were had and the planning came together. Once their plan was complete, Nadine, Caelin and I tweaked it a bit based on the dimensions of the base and transferred it there. Then, the building began…
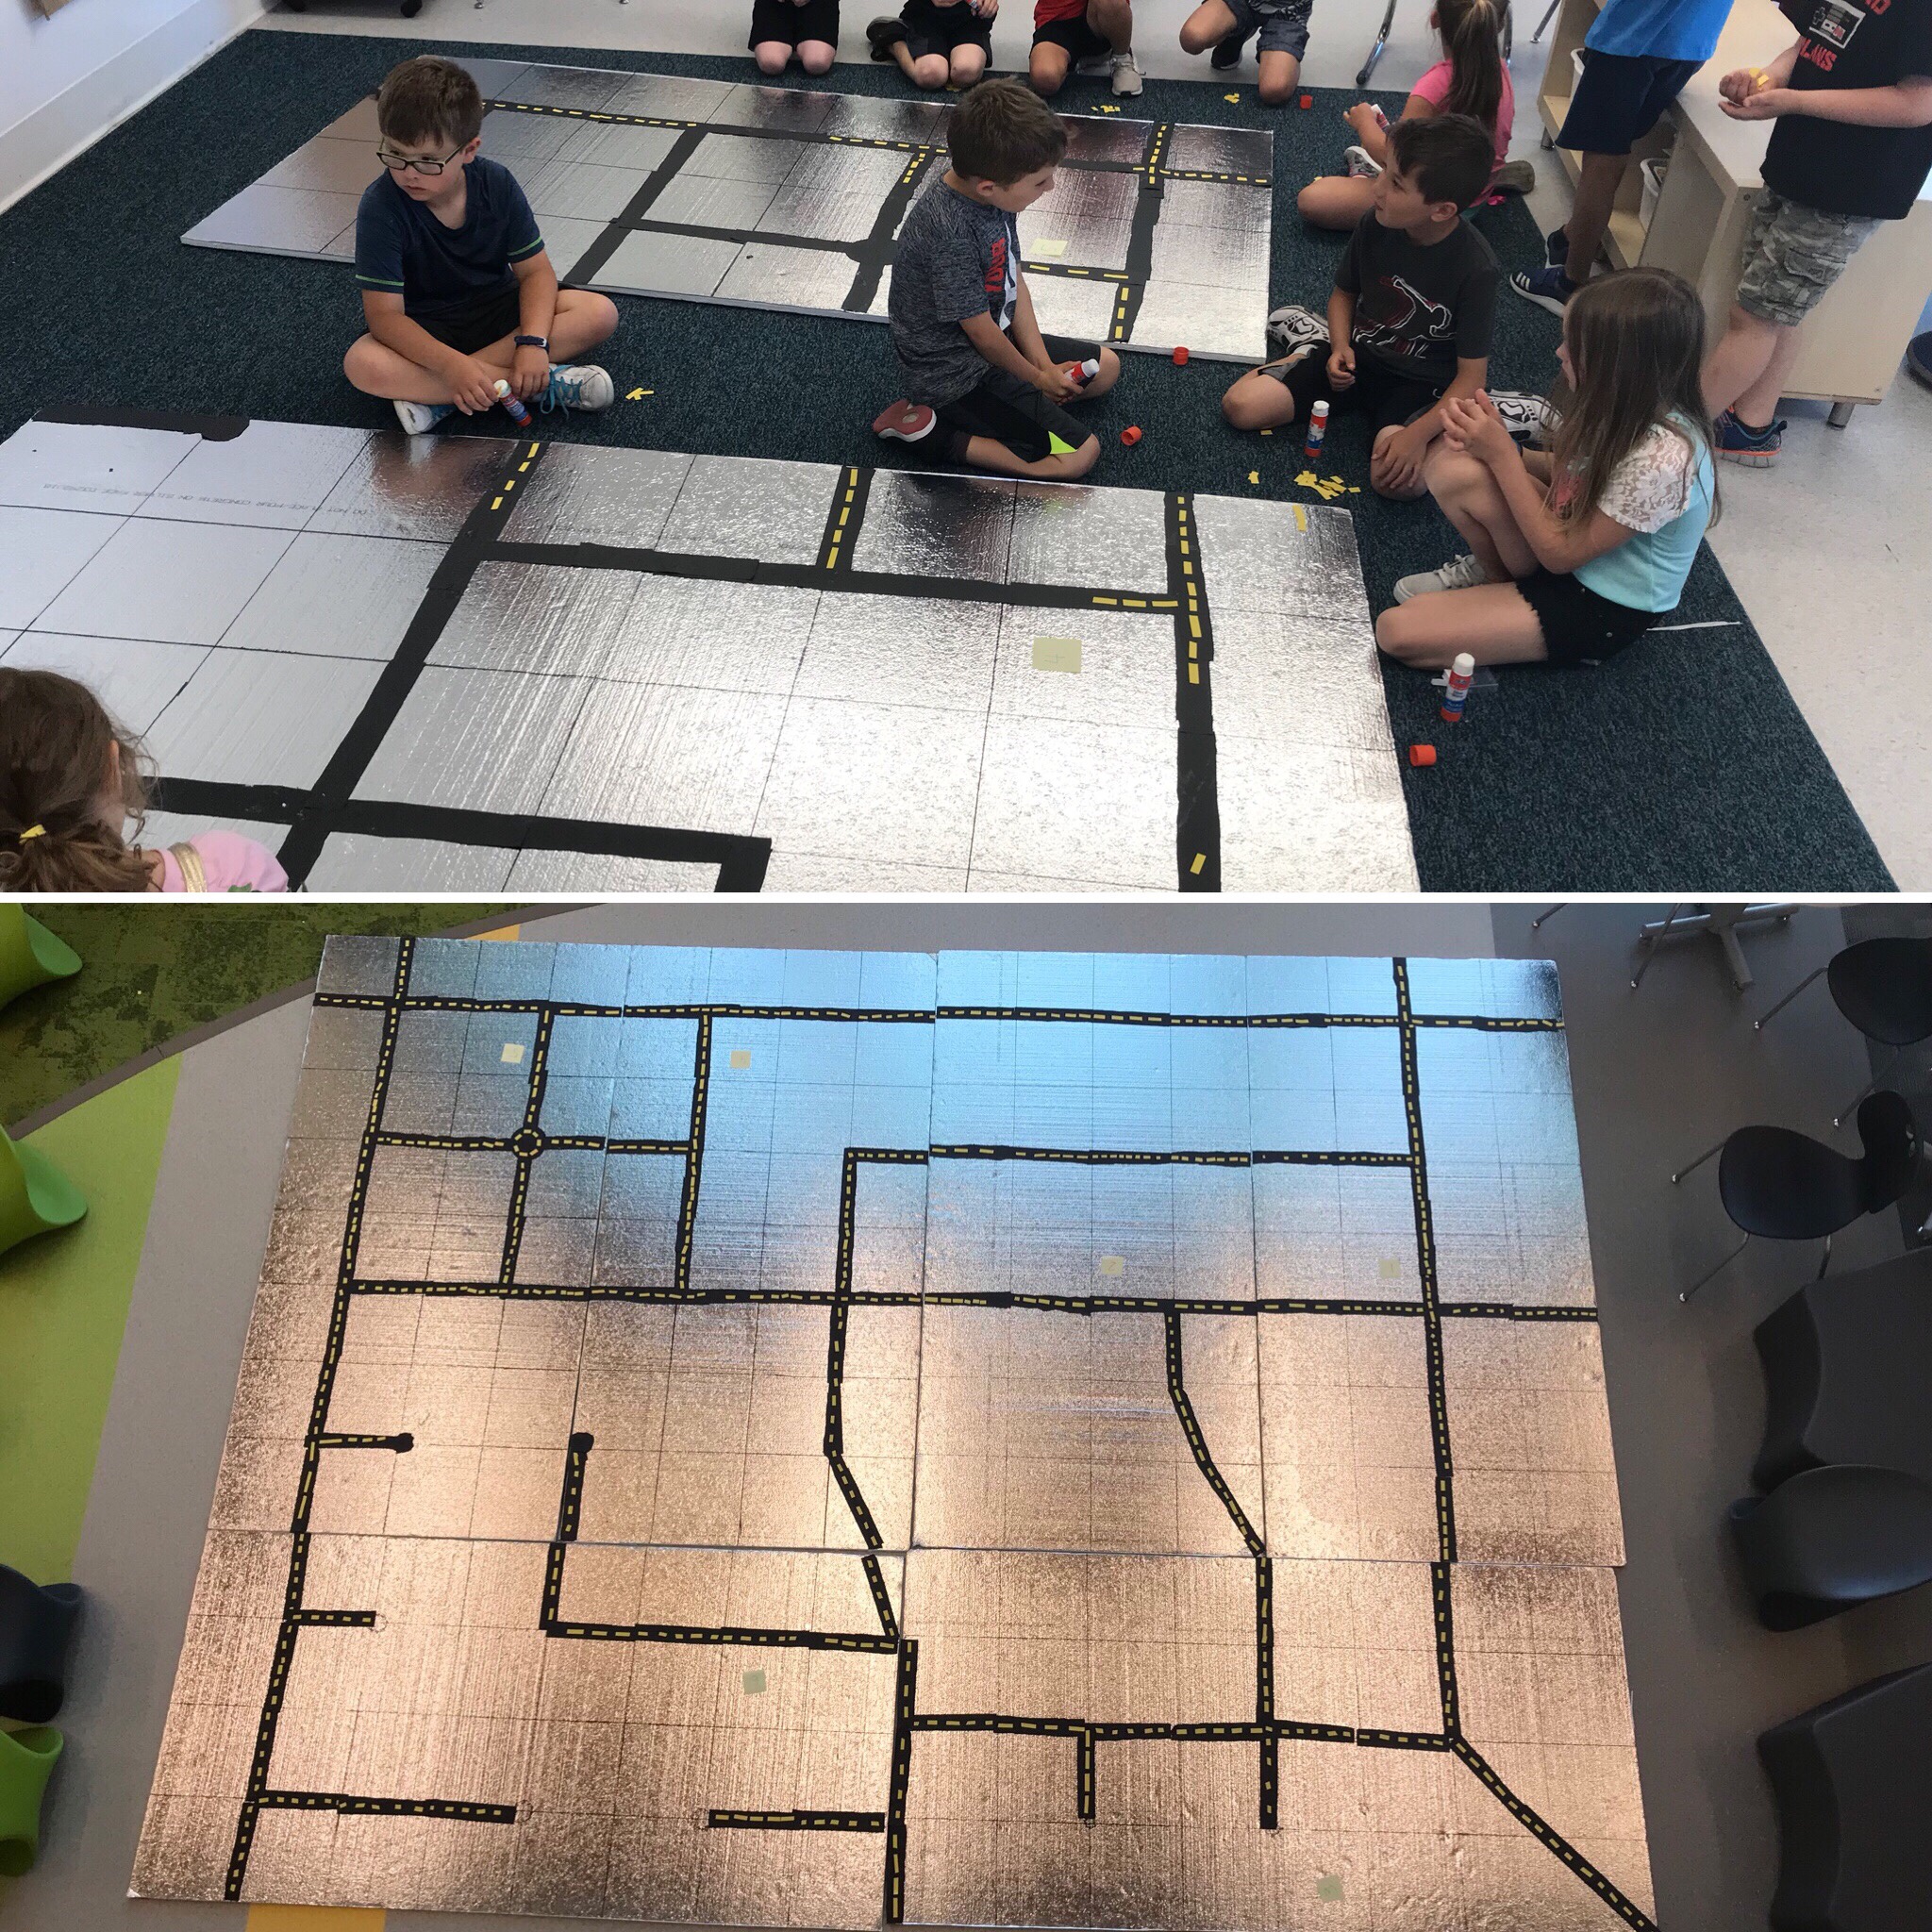
The first task to tackle was making the roads. So much discussion went into this piece alone for several reasons. First, the students had to decide what way would be the best way to build these roads. Ideas included colouring with a marker, painting, and using paper. After discussing which method would be most efficient, they decided to use paper. The students then decided that the roads should all be the same width. They didn’t want everyone doing their own thing and then coming together to roads that weren’t a consistent size. So, brainstorming and sharing of ideas continued until they agreed on folding a paper in a half, and then folding it in half again in order to make 3 lines that separated the paper in 4 same sized strips! Brilliant! They all started doing that and within a few minutes, we had roads everywhere! They applied the same type of strategy to make the little yellow lines that they wanted in the middle of their roads. And voilà, within 30 minutes, we had roads all through our community! We brought all of the pieces back together to the main learning common and the students admired their work as their community began to take shape!
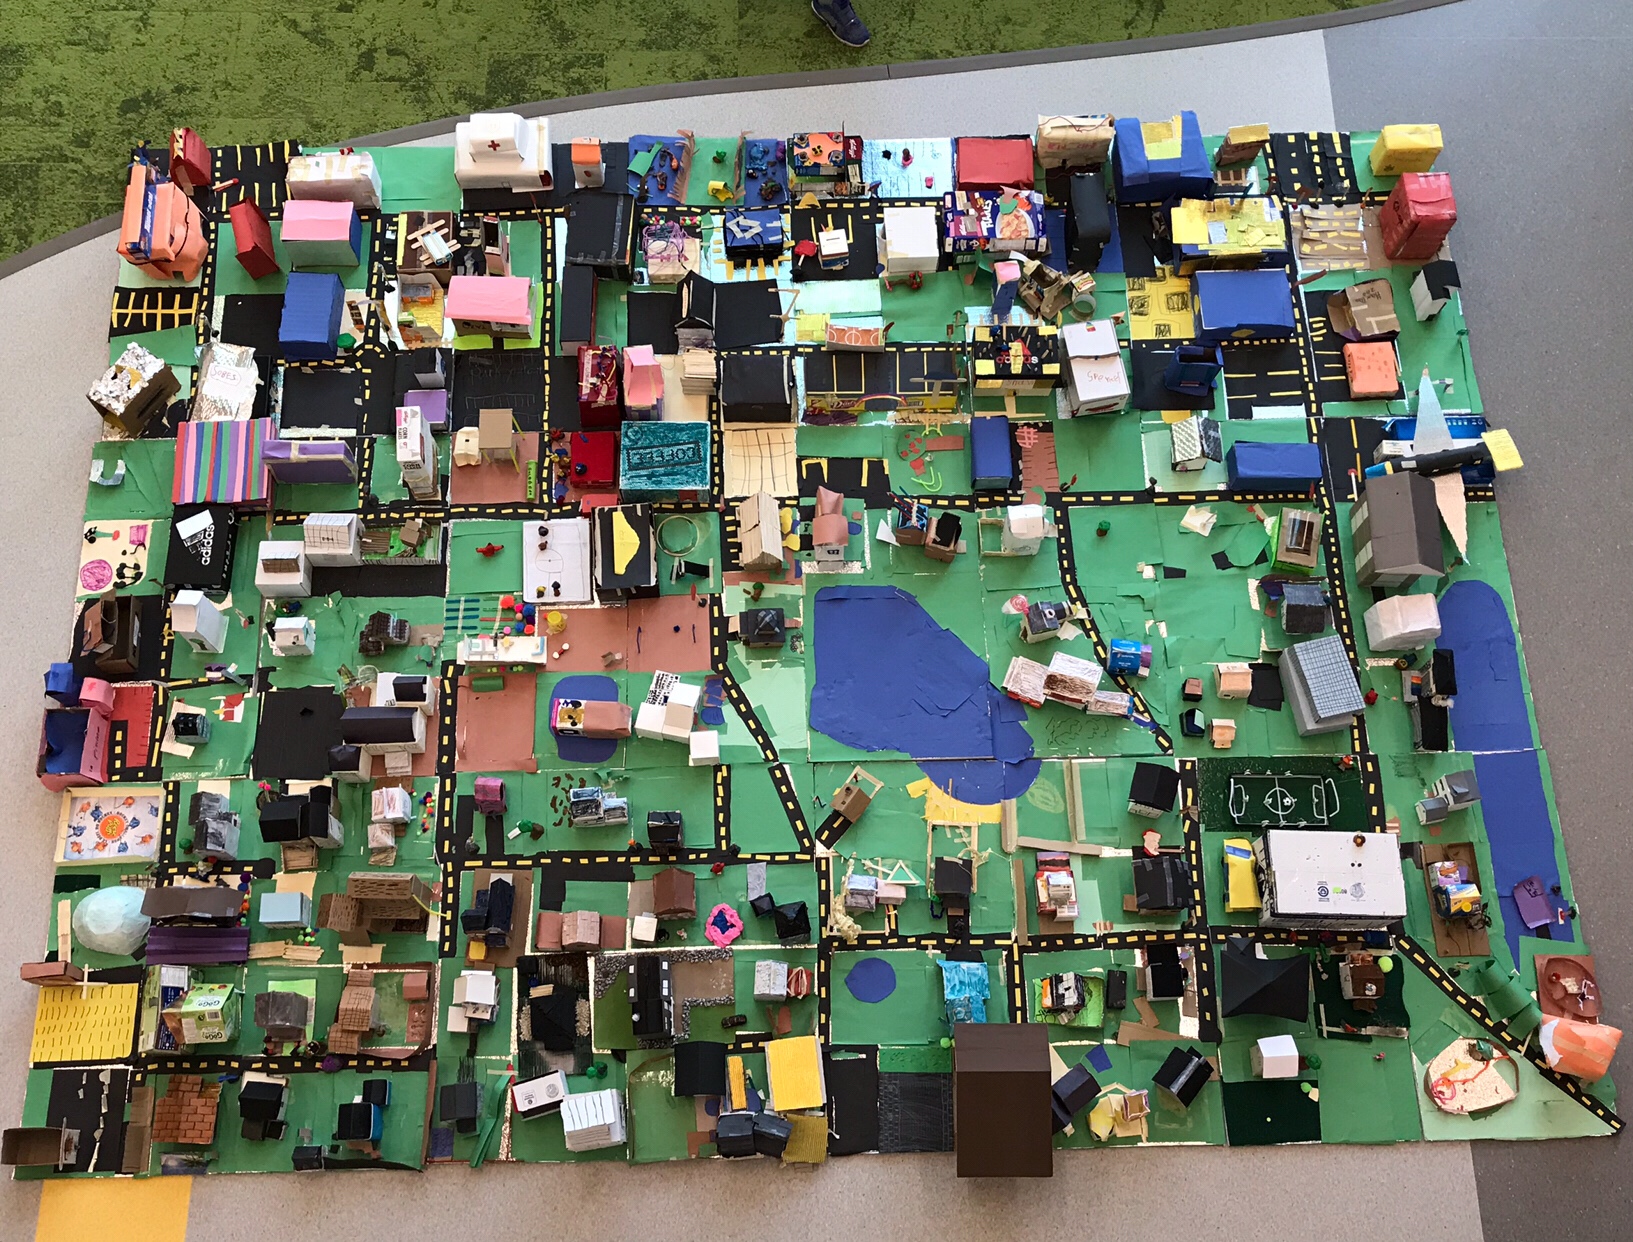
Next, Nadine, Caelin and I cut each big board (we had 6 altogether) into 4 smaller sections so that it would be easier for the students to work around the pieces that included their business or house (imagine a 24 piece puzzle, that was the base of our community). Before we continued building, we decided to make three lists of things that our community should include. Our three lists were for the “houses lots”, “business lots” and “the general community”. We took ideas from our brainstorming web and placed them in these three categories. Organizing our ideas helped guide the students in what their lots could include. Ideas were grass, driveway, trampoline, garden, parking lot, flowers, name of the business, stop signs, traffic lights, people, cars, bikes, etc. Once our lists were done, we gathered our supplies, got organized, and began creating. The boards were divided up between the 3 classrooms and our wing’s learning common and the students were told in which room their “house lot” and “business lot” could be found. They went freely between all classes to build. The students had free range of supplies and could use what they thought would help them create their two lots. The homes arrived to school already built, but they built the businesses or services from scratch at school. They then had to place their two buildings on their appropriate lots and make sure that they finished the yard or other space that was theirs. They collaborated with one another to see what worked best and how to solve certain problems that they encountered. They helped one another and made sure that they were all on track. Once their lots were complete, they had the opportunity to look at “the general community” list and create and add accordingly to our community. It was pretty spectacular as all this came together!
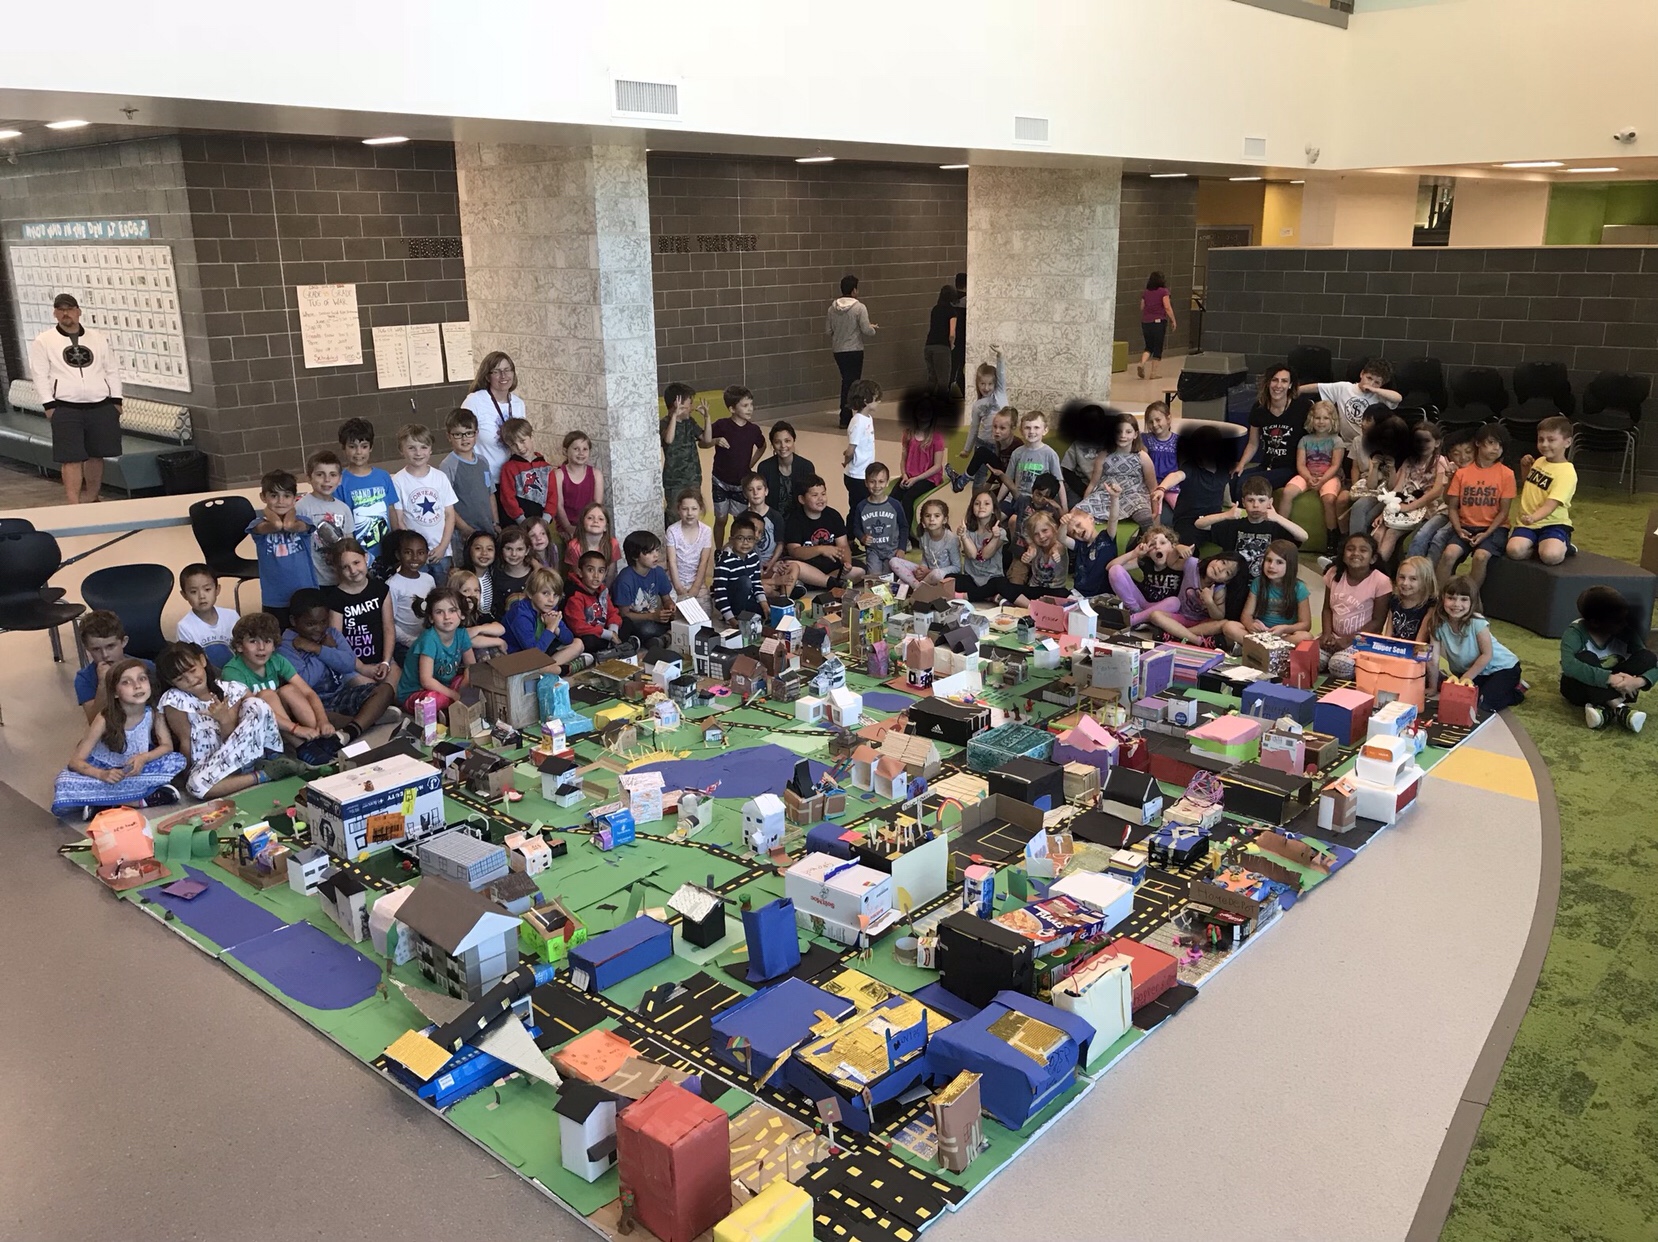
Our students had their completed 3D community on display at the Year End School BBQ earlier this week and everyone who walked by admired their work in awe. I also tweeted out a picture of their final product and the positive comments just started pouring in! This was such a special moment and I wanted my students to know the impact that they had had on so many, so we took the time to check out Twitter in order to celebrate their learning. The students were glowing as we read through the comments on my tweet, and they were so impressed by how far their project had reached. Talk about a prime example of Social Media taking learning so much further than the 4 walls of our classroom by creating a massive authentic audience!
Many things struck me during this whole process. First and foremost, ALL of the students were engaged in all activities! It didn’t matter if we were researching, brainstorming, collaborating or creating, everyone was on task and so excited (all 68 students from our 3 classes combined)! Their pride exuded and although the project took many hours of our days, they never got tired of it! In all of this, so much learning happened, but I bet you the students didn’t even realize it! So many soft skills and 21st century skill were developed on top of covering the curriculum. Furthermore, because the students were so engaged in this process, the learning that happened was much deeper! All this because they were in charge of their learning!
As I reflect on this process, I am reminded just how rich a learning experience like this can be. I am so unbelievably proud of our students for all that this 3D community represents. So much learning has gone into it and the final product is so impressive (the pictures don’t do it justice… their 3D community will be on display in our school’s main learning common until June 22nd, if you want to come take a peak in person!) Even more amazing than the final product though, is the journey that the students took to get there. The process was so rich and that is the true reason why I am so proud. Bravo les amis!
Leave a Reply